
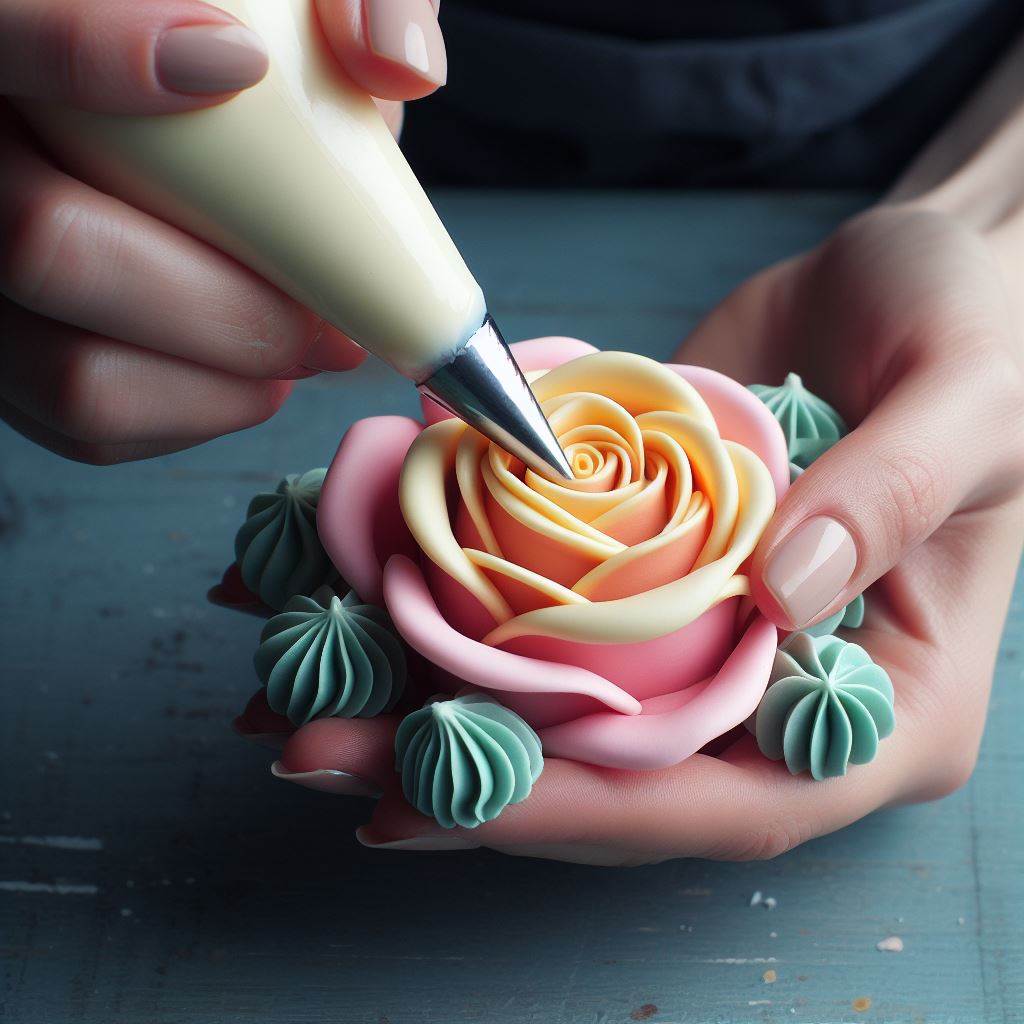
To pipe a two-toned frosting rose, fill a piping bag fitted with a petal tip with two colors of icing side by side. Squeeze the bag gently while rotating to create the layered petal effect.
Creating beautifully frosted desserts is an art form that can elevate any occasion. A two-toned frosting rose adds an elegant and visually stunning touch to cakes and cupcakes, and mastering this technique is simpler than you might think. With just a few basic tools and the proper method, even amateur bakers can produce professional-looking roses that are sure to impress.
The key to success lies in the preparation of your piping bag and the execution of a steady hand to form the delicate petals. By following these guidelines, you’ll be well on your way to crafting gorgeous two-toned roses that will become the centerpiece of your sweet creations.
Choosing Your Frosting
-
Choosing your frosting is the first step in creating a stunning two-toned rose. The right frosting not only adds flavor but also structure and beauty to your edible work of art. Whether you prefer buttercream or cream cheese, ensure it holds its shape while piping. Now, get ready to select colors that pop and prepare your frosting bags like a pro!
Selecting The Right Colors
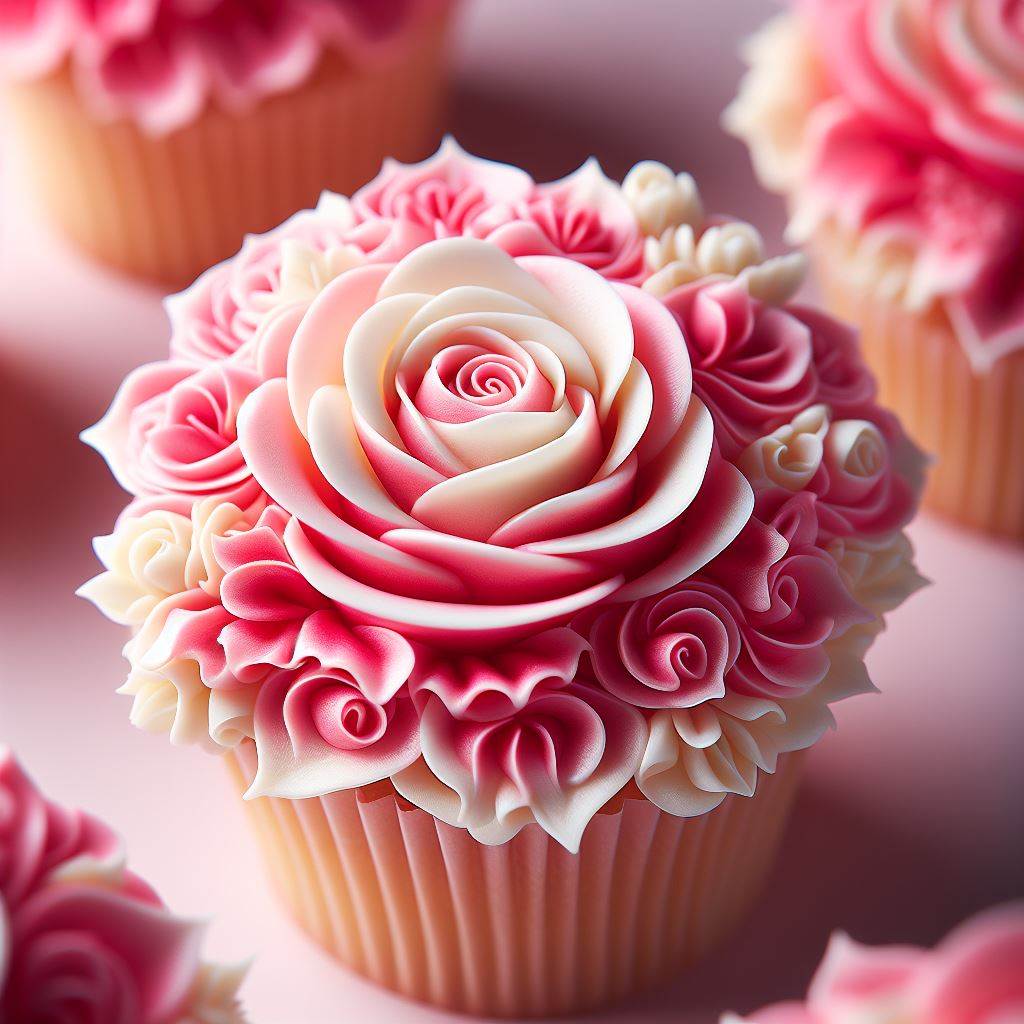
Color choice is crucial for that eye-catching effect. Opt for complementary or contrasting hues that stand out. If you aspire to mimic a natural rose, consider soft pinks and whites. For a bold statement, pair vibrant colors like purple and yellow. Use gel food coloring for intensity without changing the frosting consistency.
- Soft Pinks: They mimic real roses.
- Bright Colors: They make your rose pop.
- Gel Coloring: For rich, vibrant hues.
Prepping Your Frosting Bags
Preparing your bags takes careful attention. Start by fitting them with couplers and piping tips. Number 104 is a perfect choice for roses. Then, insert the bags into glasses to hold them upright. Now, spoon one color into one half of each bag. Repeat with the second color. Seal the bags, removing any air bubbles.
1. Fit Couplers and Tips Attach couplers and tips like #104 for rose shapes.
2. Hold Bags with Glasses Use glasses to keep the bags steady while you fill.
3. Fill with Colors Spoon colors into each side of the bags separately.
4. Seal and Remove Air Ensure there are no air pockets for smooth piping.Filled with brilliant colors and ready for action, your frosting bags are the magic wand in the art of two-toned frosting roses.
Preparing Your Piping Bag
Creating a stunning two-toned frosting rose starts with a perfectly prepared piping bag. The right tools and techniques are crucial for achieving those beautiful, intricate petals. Follow these steps to ensure your bag is prepped and ready to pipe a multicolored masterpiece onto your cakes or cupcakes.
Choosing The Right Piping Tip
The choice of piping tip is key to the rose’s appearance. Use a petal tip for the best results. A tip like the 104 is ideal. Its thin end allows for fine petal details, while the wider end gives the base necessary support.
Filling Your Piping Bag
Prepping your piping bag involves a few simple steps. First, snip the end off the bag. Next, insert your chosen petal tip. Separate the frosting colors. Spoon one color into one side of the bag. Fill the other side with the second color. Take care not to mix the colors inside the bag.
For a clean look, use a plastic wrap trick. Lay a piece of plastic wrap flat. Spread a line of the first frosting color along the edge. Repeat with the second color next to it. Roll the wrap up, twist the ends, and snip one end. Insert the rolled frosting into your bag with the tip in place.
Once your bag is filled, it’s all about the pressure you apply. Gentle and consistent pressure will give the best results. Practice a few roses on parchment paper before moving to your actual dessert.
Creating The Base Of Your Rose
Piping a two-toned frosting rose adds an enchanting touch to any cake. Mastering the art of creating a beautiful rose starts with a solid foundation. This part of the process sets the stage for a stunning edible decoration that’s sure to impress. Preparing a dual-colored rose is simple. In this section, we’ll dive into the steps to create the perfect base for your frosting flower.
Starting With The First Color
Choose a smooth, stiff buttercream for the first color. This will shape your rose. Fit a piping bag with a petal tip, number 104 works well.
- Place the bag in a tall glass to keep it steady.
- Spoon your first color of frosting into one side of the bag.
- Push the frosting down, removing all air pockets.
- Twist the top of the bag to secure the filling.
Test a strip of frosting. Ensure it flows in a firm, smooth ribbon.
Adding The Second Color
Now, let’s introduce the second shade to your rose. The contrast gives your flower depth and visual appeal.
- Clean and dry the glass used previously.
- Open another piping bag with the same petal tip.
- Fill the other side of the bag with your second color.
- Ensure both colors meet at the tip, but do not mix.
Squeeze the bag gently. Check for a seamless blend of the two tones. You’re now ready to start crafting your two-toned rose!
Piping The Petals
Creating a two-toned frosting rose is like painting with sweets. The magic begins as you pipe the petals. Simple techniques turn frosting into stunning flowers. Your cupcakes will be the belle of the ball with these floral masterpieces atop.
Making The First Petal
Start with a well-angled piping bag. Hold it so the darker shade is inward. Squeeze gently. Let the frosting fan out. Form a thin rainbow shape. This is your rose’s heart.
- Fit a piping bag with a petal tip.
- Fill one side with a light-tone frosting.
- Fill the opposite side with a darker shade.
- Pipe a small upright ribbon to form the center.
Building Up The Rose
Layer petals around the center, slightly overlapping each. Spin the nail to keep symmetry. Each layer expands the bloom. Watch your rose flourish with each petal piped. Delight in your blooming rose!
- Hold the piping bag at a 45-degree angle.
- Pipe the petals by moving from the base to the edges.
- Add rows of petals, increasing their size.
- Continue until the rose reaches the desired fullness.
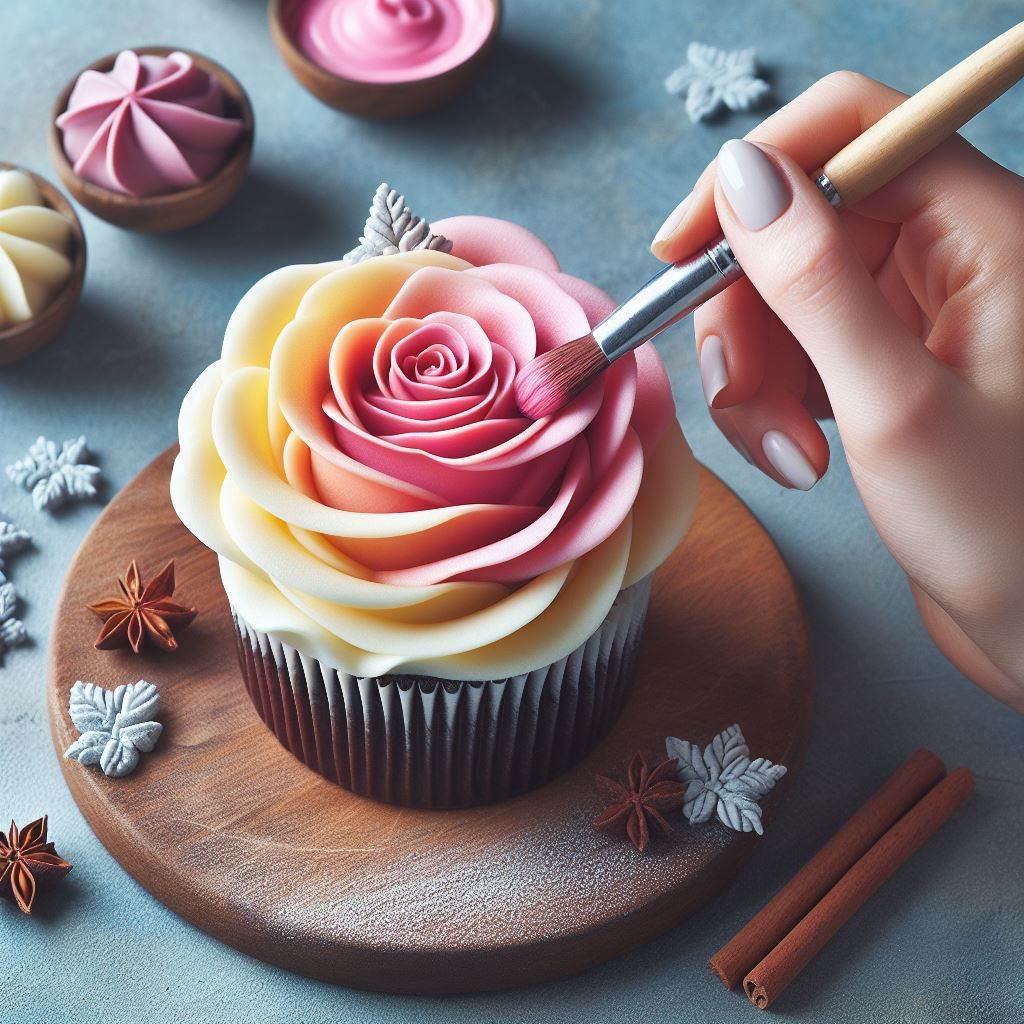
Adding Details And Finishing Touches
Now that you’ve piped a stunning two-toned rose, it’s time for those essential finishing touches. These details bring your creation to life, making each rose unique. The intricacy of each petal and the delicate curve of the leaves are what will set your roses apart. Here’s how to add those beautiful details and finish with a flourish.
Creating The Center
The center of your rose is the focal point. Begin with a small dollop of frosting to form the base. Then, wrap a tight spiral of your darker toned frosting at the center. This will create the inviting look of a rose that’s just beginning to bloom. A fine piping tip works best for precision. Make sure the center stands taller than the rest of the petals, as it represents the heart of your flower.
Adding Leaves And Stems
To add realism to your roses, you can’t forget the leaves and stems. Use a leaf piping tip to add a few green leaves at the base. Place them strategically where petals would naturally connect to the stem. For stems, a touch of brown or green frosting piped onto your display surface will anchor your roses beautifully. Remember to vary leaf sizes for a more natural appearance.
- Swirl the leaves: Pipe with a steady hand to create beautiful leaf shapes.
- Add lines for texture: Use a toothpick or a fine tip to draw vein lines on each leaf.
- Use contrasting greens: Mix shades of green to give depth to your foliage.
Troubleshooting
When piping a two-toned frosting rose, a few common issues might arise. Troubleshooting these problems ensures picture-perfect results every time. Frosting consistency and petal evenness are crucial factors for a stunning rose. Follow these tips to overcome these challenges.
Issues With Frosting Consistency
Frosting that’s either too stiff or too runny can ruin your floral creation. A perfect consistency should hold its shape while being soft enough to pipe smoothly.
- Too Stiff: If frosting is difficult to pipe, it’s too thick. Add a teaspoon of milk or cream. Mix well.
- Too Runny: Runny frosting won’t form neat petals. Gradually add more powdered sugar until the desired thickness is achieved.
Fixing Uneven Petals
Uneven petals detract from the rose’s beauty. Practice makes perfect. Here’s how to fix uneven petals:
- Pressure: Unequal pressure can cause misshapen petals. Practice consistent pressure when piping.
- Speed: Piping too fast or slow can warp the petal shape. Maintain an even, moderate speed.
- Position: Hold the piping bag at a 45-degree angle. This position helps form uniform petals.
Check your work as you pipe. Adjust your technique to correct any imperfections.
Decorating Tips And Ideas
Creating a two-toned frosting rose not only adds elegance to your cake, but also offers a burst of color. Use these decorating tips and ideas to enhance your cake designs and captivate everyone’s eyes.
Using Different Color Combinations
Choosing the right colors is essential for that perfect rose. Here’s a guide to inspire:
- Classic Red and White: Combine red and white for a traditional look.
- Pastel shades: Soft pink and baby blue create a gentle appearance.
- Vibrant Contrast: Yellow with purple frosting gives a bold statement.
- Ombre Effect: Use light and dark shades of the same color for a chic look.
Match these with your theme to achieve a stunning effect.
Practice Makes Perfect
Piping a two-toned rose on a cake sounds daunting, right? Don’t worry. Practice is your best friend here.
Just like a painter perfects their brush strokes, a baker perfects their piping techniques. With dedication, those tricky frosting flowers will blossom into edible works of art.
Start With Basic Shapes
Begin your journey with simple circles and stars. They set the foundation for intricate designs. Here’s how to get started:
- Fit a piping bag with a round tip; fill it with frosting.
- Squeeze the bag gently to form dots and lines on parchment paper.
- Graduate to star tips, creating stars and shells.
Consistent practice turns basic shapes into muscle memory. Soon, your hands will move with precision and confidence.
Experiment With Different Techniques
Once you’ve mastered basic shapes, it’s time to mix things up. Try these techniques:
1. Striped Bag Add two frosting colors to a single bag for a stunning effect.
2. Petal Tip Use a petal tip to create ruffled edges and delicate flower petals.
Remember, patience is key. Your skills will bloom as you blend colors and shapes.
Frequently Asked Questions On How To Pipe A Two Toned Frosting Rose
What Supplies Are Needed For Two-toned Roses?
To pipe two-toned frosting roses, you’ll need a piping bag, a 104 petal tip, spatula, icing colors, and stiff buttercream frosting. Choose two complementary colors for the best visual effect.
Can I Make Two-toned Roses With Fondant?
While fondant is typically used for smooth and precise decorations, two-toned roses are better suited to buttercream. Fondant lacks the texture needed to pipe the delicate petals of a rose.
How Do I Prepare The Piping Bag For Two Colors?
To prepare a piping bag, insert the petal tip first. Then, vertically stripe the interior with two colors using a spatula. Fill it evenly, ensuring colors don’t mix, for a clean two-toned effect.
What Is The Technique For Piping A Rose?
To pipe a rose, start with a small cone of frosting for the base. Then, rotate the flower nail while you pipe overlapping petals outward, creating a blooming effect with the two-toned swirl.
Conclusion
Crafting a two-toned frosting rose can elevate your baking artistry to new heights. With practice, these stunning creations will become a quick addition to your decorating skills. Remember, patience and the right consistency are key. Embrace the process, and soon, your desserts will blossom with beautiful, edible roses.
Ready to impress at your next gathering? Start piping!
To pipe a two-toned frosting rose, fill a piping bag fitted with a petal tip with two colors of icing side by side. Squeeze the bag gently while rotating to create the layered petal effect.
Creating beautifully frosted desserts is an art form that can elevate any occasion. A two-toned frosting rose adds an elegant and visually stunning touch to cakes and cupcakes, and mastering this technique is simpler than you might think. With just a few basic tools and the proper method, even amateur bakers can produce professional-looking roses that are sure to impress.
The key to success lies in the preparation of your piping bag and the execution of a steady hand to form the delicate petals. By following these guidelines, you’ll be well on your way to crafting gorgeous two-toned roses that will become the centerpiece of your sweet creations.
Choosing Your Frosting
-
Choosing your frosting is the first step in creating a stunning two-toned rose. The right frosting not only adds flavor but also structure and beauty to your edible work of art. Whether you prefer buttercream or cream cheese, ensure it holds its shape while piping. Now, get ready to select colors that pop and prepare your frosting bags like a pro!
Selecting The Right Colors
Color choice is crucial for that eye-catching effect. Opt for complementary or contrasting hues that stand out. If you aspire to mimic a natural rose, consider soft pinks and whites. For a bold statement, pair vibrant colors like purple and yellow. Use gel food coloring for intensity without changing the frosting consistency.
- Soft Pinks: They mimic real roses.
- Bright Colors: They make your rose pop.
- Gel Coloring: For rich, vibrant hues.
Prepping Your Frosting Bags
Preparing your bags takes careful attention. Start by fitting them with couplers and piping tips. Number 104 is a perfect choice for roses. Then, insert the bags into glasses to hold them upright. Now, spoon one color into one half of each bag. Repeat with the second color. Seal the bags, removing any air bubbles.
1. Fit Couplers and Tips Attach couplers and tips like #104 for rose shapes.
2. Hold Bags with Glasses Use glasses to keep the bags steady while you fill.
3. Fill with Colors Spoon colors into each side of the bags separately.
4. Seal and Remove Air Ensure there are no air pockets for smooth piping.Filled with brilliant colors and ready for action, your frosting bags are the magic wand in the art of two-toned frosting roses.
Preparing Your Piping Bag
Creating a stunning two-toned frosting rose starts with a perfectly prepared piping bag. The right tools and techniques are crucial for achieving those beautiful, intricate petals. Follow these steps to ensure your bag is prepped and ready to pipe a multicolored masterpiece onto your cakes or cupcakes.
Choosing The Right Piping Tip
The choice of piping tip is key to the rose’s appearance. Use a petal tip for the best results. A tip like the 104 is ideal. Its thin end allows for fine petal details, while the wider end gives the base necessary support.
Filling Your Piping Bag
Prepping your piping bag involves a few simple steps. First, snip the end off the bag. Next, insert your chosen petal tip. Separate the frosting colors. Spoon one color into one side of the bag. Fill the other side with the second color. Take care not to mix the colors inside the bag.
For a clean look, use a plastic wrap trick. Lay a piece of plastic wrap flat. Spread a line of the first frosting color along the edge. Repeat with the second color next to it. Roll the wrap up, twist the ends, and snip one end. Insert the rolled frosting into your bag with the tip in place.
Once your bag is filled, it’s all about the pressure you apply. Gentle and consistent pressure will give the best results. Practice a few roses on parchment paper before moving to your actual dessert.
Creating The Base Of Your Rose
Piping a two-toned frosting rose adds an enchanting touch to any cake. Mastering the art of creating a beautiful rose starts with a solid foundation. This part of the process sets the stage for a stunning edible decoration that’s sure to impress. Preparing a dual-colored rose is simple. In this section, we’ll dive into the steps to create the perfect base for your frosting flower.
Starting With The First Color
Choose a smooth, stiff buttercream for the first color. This will shape your rose. Fit a piping bag with a petal tip, number 104 works well.
- Place the bag in a tall glass to keep it steady.
- Spoon your first color of frosting into one side of the bag.
- Push the frosting down, removing all air pockets.
- Twist the top of the bag to secure the filling.
Test a strip of frosting. Ensure it flows in a firm, smooth ribbon.
Adding The Second Color
Now, let’s introduce the second shade to your rose. The contrast gives your flower depth and visual appeal.
- Clean and dry the glass used previously.
- Open another piping bag with the same petal tip.
- Fill the other side of the bag with your second color.
- Ensure both colors meet at the tip, but do not mix.
Squeeze the bag gently. Check for a seamless blend of the two tones. You’re now ready to start crafting your two-toned rose!
Piping The Petals
Creating a two-toned frosting rose is like painting with sweets. The magic begins as you pipe the petals. Simple techniques turn frosting into stunning flowers. Your cupcakes will be the belle of the ball with these floral masterpieces atop.
Making The First Petal
Start with a well-angled piping bag. Hold it so the darker shade is inward. Squeeze gently. Let the frosting fan out. Form a thin rainbow shape. This is your rose’s heart.
- Fit a piping bag with a petal tip.
- Fill one side with a light-tone frosting.
- Fill the opposite side with a darker shade.
- Pipe a small upright ribbon to form the center.
Building Up The Rose
Layer petals around the center, slightly overlapping each. Spin the nail to keep symmetry. Each layer expands the bloom. Watch your rose flourish with each petal piped. Delight in your blooming rose!
- Hold the piping bag at a 45-degree angle.
- Pipe the petals by moving from the base to the edges.
- Add rows of petals, increasing their size.
- Continue until the rose reaches the desired fullness.
Adding Details And Finishing Touches
Now that you’ve piped a stunning two-toned rose, it’s time for those essential finishing touches. These details bring your creation to life, making each rose unique. The intricacy of each petal and the delicate curve of the leaves are what will set your roses apart. Here’s how to add those beautiful details and finish with a flourish.
Creating The Center
The center of your rose is the focal point. Begin with a small dollop of frosting to form the base. Then, wrap a tight spiral of your darker toned frosting at the center. This will create the inviting look of a rose that’s just beginning to bloom. A fine piping tip works best for precision. Make sure the center stands taller than the rest of the petals, as it represents the heart of your flower.
Adding Leaves And Stems
To add realism to your roses, you can’t forget the leaves and stems. Use a leaf piping tip to add a few green leaves at the base. Place them strategically where petals would naturally connect to the stem. For stems, a touch of brown or green frosting piped onto your display surface will anchor your roses beautifully. Remember to vary leaf sizes for a more natural appearance.
- Swirl the leaves: Pipe with a steady hand to create beautiful leaf shapes.
- Add lines for texture: Use a toothpick or a fine tip to draw vein lines on each leaf.
- Use contrasting greens: Mix shades of green to give depth to your foliage.
Troubleshooting
When piping a two-toned frosting rose, a few common issues might arise. Troubleshooting these problems ensures picture-perfect results every time. Frosting consistency and petal evenness are crucial factors for a stunning rose. Follow these tips to overcome these challenges.
Issues With Frosting Consistency
Frosting that’s either too stiff or too runny can ruin your floral creation. A perfect consistency should hold its shape while being soft enough to pipe smoothly.
- Too Stiff: If frosting is difficult to pipe, it’s too thick. Add a teaspoon of milk or cream. Mix well.
- Too Runny: Runny frosting won’t form neat petals. Gradually add more powdered sugar until the desired thickness is achieved.
Fixing Uneven Petals
Uneven petals detract from the rose’s beauty. Practice makes perfect. Here’s how to fix uneven petals:
- Pressure: Unequal pressure can cause misshapen petals. Practice consistent pressure when piping.
- Speed: Piping too fast or slow can warp the petal shape. Maintain an even, moderate speed.
- Position: Hold the piping bag at a 45-degree angle. This position helps form uniform petals.
Check your work as you pipe. Adjust your technique to correct any imperfections.
Decorating Tips And Ideas
Creating a two-toned frosting rose not only adds elegance to your cake, but also offers a burst of color. Use these decorating tips and ideas to enhance your cake designs and captivate everyone’s eyes.
Using Different Color Combinations
Choosing the right colors is essential for that perfect rose. Here’s a guide to inspire:
- Classic Red and White: Combine red and white for a traditional look.
- Pastel shades: Soft pink and baby blue create a gentle appearance.
- Vibrant Contrast: Yellow with purple frosting gives a bold statement.
- Ombre Effect: Use light and dark shades of the same color for a chic look.
Match these with your theme to achieve a stunning effect.
Practice Makes Perfect
Piping a two-toned rose on a cake sounds daunting, right? Don’t worry. Practice is your best friend here.
Just like a painter perfects their brush strokes, a baker perfects their piping techniques. With dedication, those tricky frosting flowers will blossom into edible works of art.
Start With Basic Shapes
Begin your journey with simple circles and stars. They set the foundation for intricate designs. Here’s how to get started:
- Fit a piping bag with a round tip; fill it with frosting.
- Squeeze the bag gently to form dots and lines on parchment paper.
- Graduate to star tips, creating stars and shells.
Consistent practice turns basic shapes into muscle memory. Soon, your hands will move with precision and confidence.
Experiment With Different Techniques
Once you’ve mastered basic shapes, it’s time to mix things up. Try these techniques:
1. Striped Bag Add two frosting colors to a single bag for a stunning effect.
2. Petal Tip Use a petal tip to create ruffled edges and delicate flower petals.
Remember, patience is key. Your skills will bloom as you blend colors and shapes.
Frequently Asked Questions On How To Pipe A Two Toned Frosting Rose
What Supplies Are Needed For Two-toned Roses?
To pipe two-toned frosting roses, you’ll need a piping bag, a 104 petal tip, spatula, icing colors, and stiff buttercream frosting. Choose two complementary colors for the best visual effect.
Can I Make Two-toned Roses With Fondant?
While fondant is typically used for smooth and precise decorations, two-toned roses are better suited to buttercream. Fondant lacks the texture needed to pipe the delicate petals of a rose.
How Do I Prepare The Piping Bag For Two Colors?
To prepare a piping bag, insert the petal tip first. Then, vertically stripe the interior with two colors using a spatula. Fill it evenly, ensuring colors don’t mix, for a clean two-toned effect.
What Is The Technique For Piping A Rose?
To pipe a rose, start with a small cone of frosting for the base. Then, rotate the flower nail while you pipe overlapping petals outward, creating a blooming effect with the two-toned swirl.
Conclusion
Crafting a two-toned frosting rose can elevate your baking artistry to new heights. With practice, these stunning creations will become a quick addition to your decorating skills. Remember, patience and the right consistency are key. Embrace the process, and soon, your desserts will blossom with beautiful, edible roses.
Ready to impress at your next gathering? Start piping!