Cake-ideas

The Most Popular Cookie Recipes in America

Cookie recipes

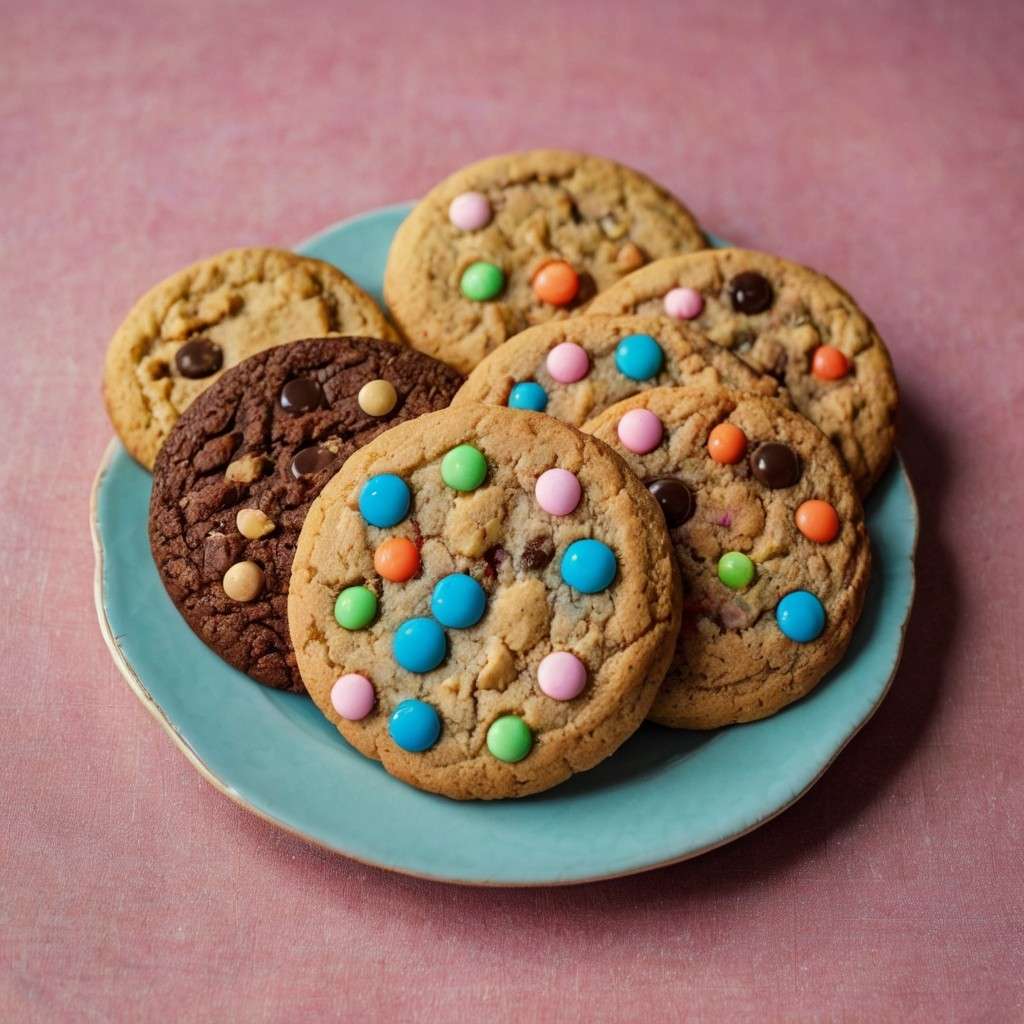
“The Most Popular Cookie Recipes in America” showcases a collection of beloved cookie recipes from across the United States. This guide brings together timeless favorites and regional specialties, offering easy-to-follow instructions for making cookies that have captured Americans’ hearts (and taste buds) everywhere. Perfect for both baking enthusiasts and casual cooks, this book celebrates the diverse and delicious world of American cookies. Cookie Recipes cottage cheese cookie dough If you love cookies, you will enjoy this unique recipe. Cottage cheese cookie dough is a fun and healthy way to enjoy dessert. It is not only tasty but also nutritious. This article will teach you how to make it, its benefits, and some fun variations. What is Cottage Cheese Cookie Dough? Cottage cheese cookie dough is a special type of cookie dough. It uses cottage cheese instead of traditional fats like butter. This makes the dough creamy and delicious. You can eat it raw or bake it into cookies. The choice is yours! Benefits of Cottage Cheese Cottage cheese is a nutritious food. Here are some benefits: High in Protein: Cottage cheese is rich in protein. This helps build muscles and keeps you full. Low in Fat: It is lower in fat compared to other dairy products. Rich in Calcium: This helps strengthen bones and teeth. Contains Probiotics: These good bacteria help your digestion. Credit: www.eatingbirdfood.com Easy Cottage Cheese Cookie Dough Recipe Now, let’s dive into the recipe! This is a simple recipe that anyone can follow. You will need the following ingredients: Ingredients: 1 cup cottage cheese 1/2 cup sugar 1 cup all-purpose flour 1/2 cup chocolate chips 1 teaspoon vanilla extract 1/2 teaspoon baking powder Pinch of salt Instructions: In a mixing bowl, combine the cottage cheese and sugar. Add the vanilla extract and mix well. In another bowl, mix the flour, baking powder, and salt. Slowly add the dry ingredients to the wet mixture. Stir until everything is combined. Add the chocolate chips and mix again. Cover the bowl and chill in the fridge for 30 minutes. Enjoy the dough raw or bake it into cookies! Credit: basicswithbails.com Baking the Cookies If you choose to bake the cookie dough, here’s how: Baking Instructions: Preheat your oven to 350°F (175°C). Line a baking sheet with parchment paper. Use a spoon to scoop dough onto the sheet. Leave some space between each scoop. Bake for 12-15 minutes or until lightly golden. Let them cool before enjoying! Fun Variations to Try Now that you know the basic recipe, let’s explore some fun variations. You can customize the dough to suit your taste! 1. Peanut Butter Flavor Add 1/4 cup of peanut butter to the mixture. This will give your cookie dough a yummy nutty taste! 2. Oatmeal Cookies Replace 1/2 cup of flour with oats. This adds texture and a healthy twist. 3. Fruit Additions Mix in dried fruits like raisins or cranberries. This adds sweetness and chewiness. 4. Spice It Up Try adding cinnamon or nutmeg for a warm flavor. Just a pinch will do! Storing Your Cookie Dough If you have leftover cookie dough, you can store it in the fridge. Here’s how: Place the dough in an airtight container. Keep it in the fridge for up to one week. You can also freeze it for up to three months. Frequently Asked Questions Is Cottage Cheese Cookie Dough Safe To Eat Raw? Yes! Using pasteurized cottage cheese makes it safe to eat raw. Can I Make This Recipe Gluten-free? Absolutely! Use gluten-free flour instead of regular flour. What Can I Do With Leftover Cookies? Store them in an airtight container. They will stay fresh for a few days. Conclusion Cottage cheese cookie dough is a delightful treat. It combines fun and nutrition in one bite. Whether you enjoy it raw or baked, it’s sure to please everyone. Try out the variations to find your favorite flavor. Happy baking! Protein Cookies Are you looking for a tasty snack that is also healthy? Look no further! Protein cookies are a fantastic option. They are yummy, easy to make, and packed with protein. This article will explore everything you need to know about protein cookies. From their benefits to delicious recipes, we have it all! What Are Protein Cookies? Protein cookies are cookies that contain extra protein. Traditional cookies are often high in sugar and low in nutrients. Protein cookies, however, are made to be healthier. They can include protein powder, nuts, or seeds. This makes them a better snack option! Benefits of Protein Cookies Protein cookies offer many benefits: High in Protein: They help build and repair muscles. Healthy Snack: They are better than regular cookies. Easy to Make: You can whip them up in no time. Customizable: You can add your favorite flavors and ingredients. Perfect for On-the-Go: They are easy to pack for lunch or snacks. How to Make Protein Cookies Making protein cookies is simple! Here’s a basic recipe to get you started: Ingredients: 1 cup of oats 1/2 cup of protein powder 1/4 cup of honey or maple syrup 1/2 cup of nut butter (like peanut or almond) 1/2 cup of chocolate chips (optional) A pinch of salt Instructions: Preheat your oven to 350°F (175°C). In a bowl, mix the oats and protein powder. Add the honey and nut butter. Mix well. If you want, add chocolate chips. Form small balls and place them on a baking sheet. Bake for 10-12 minutes or until golden brown. Let them cool before enjoying! Credit: www.walmart.com Different Types of Protein Cookies Protein cookies can come in many flavors and styles. Here are some popular types: Chocolate Chip Protein Cookies This classic flavor is a favorite for many! Adding chocolate chips gives a sweet touch. Peanut Butter Protein Cookies These cookies are rich and creamy. Peanut butter adds healthy fats and protein. Oatmeal Raisin Protein Cookies A chewy option that is full of flavor. Oats and raisins make a delightful combination. Double Chocolate Protein Cookies For chocolate lovers, this is a dream come true! These cookies are rich and satisfying. Where to Buy Protein Cookies If you don’t want to bake, you can buy protein cookies! Many stores and online shops sell them. Look for brands that use natural ingredients. Check the label for protein content. This ensures you get a healthy snack. How to Store Protein Cookies Storing protein cookies properly is important. Here are some tips: Keep them in an airtight container. Store them in a cool, dry place. You can freeze them for longer storage. Reheat them in the oven for a warm treat. Credit: www.kroger.com Protein Cookies for Different Lifestyles Protein cookies are great for many people. Here are a few examples: Fitness Enthusiasts People who exercise a lot need extra protein. Protein cookies make a great post-workout snack. Busy Students Students can grab a protein cookie between classes. It helps keep them energized for studying. Parents On The Go Parents can pack protein cookies for their kids. They are a healthier alternative to sugary snacks. Fun Facts About Protein Cookies Here are some fun facts you might not know: Protein cookies can be vegan! Use plant-based protein. They can also be gluten-free. Use gluten-free oats and flour. Some people add superfoods like chia seeds or flaxseeds. Protein cookies can be enjoyed any time of day! Conclusion Protein cookies are a delightful and nutritious snack. They are easy to make and can fit into any diet. Whether you are an athlete or just want a tasty treat, protein cookies are a great choice. Try making your own at home or buy some from the store. Enjoy the benefits of protein while satisfying your sweet tooth! Now that you know all about protein cookies, why not give them a try? You won’t regret it! Wafer Cookies Wafer cookies are a beloved snack enjoyed by many. They are light, crispy, and full of flavor. These cookies are perfect for any occasion. In this article, we will explore wafer cookies in detail. You will learn about their history, types, and how to enjoy them. Let’s dive in! What Are Wafer Cookies? Wafer cookies are thin, crunchy cookies. They are made from flour, sugar, and water. The dough is rolled out and baked until crisp. The texture is light and airy. This makes them different from regular cookies. Credit: www.amazon.com A Brief History of Wafer Cookies Wafer cookies have a long history. They date back to the 19th century. Originally, they were made in Europe. Bakers would create these cookies using iron molds. They were often filled with cream or jam. As time went on, wafer cookies became popular worldwide. Today, they can be found in many flavors. People enjoy them as snacks or desserts. Types of Wafer Cookies There are many types of wafer cookies. Each type has its unique taste and texture. Here are some popular varieties: Chocolate Wafers: These cookies are rich and chocolatey. They are loved by chocolate fans. Vanilla Wafers: These are light and sweet. They have a lovely vanilla flavor. Strawberry Wafers: These cookies are fruity and fun. They are perfect for summer. Peanut Butter Wafers: These have a nutty taste. They are great for peanut butter lovers. Credit: www.etsy.com How to Enjoy Wafer Cookies Wafer cookies are versatile treats. They can be enjoyed in many ways. Here are some ideas on how to savor them: As a Snack: Eat them straight from the package. They are delicious and easy to grab! With Ice Cream: Crush them up and sprinkle on top of your favorite ice cream. In Desserts: Use them to make layered desserts. They add crunch and flavor. With Milk: Dip them in milk for a tasty treat. It’s a classic combination. Health Aspects of Wafer Cookies Wafer cookies can be enjoyed in moderation. They are often lighter than regular cookies. However, some may contain added sugars and fats. Always check the label when buying. Look for options that are lower in sugar. Some brands offer whole grain options. These can be a healthier choice. They provide more fiber and nutrients. Balance your diet by enjoying wafer cookies with fruits and nuts. How to Make Wafer Cookies at Home Making wafer cookies at home is fun! Here’s a simple recipe to try: Ingredients 1 cup all-purpose flour 1/2 cup sugar 1/4 cup butter, melted 1/2 cup water 1 teaspoon vanilla extract Instructions Preheat your oven to 350°F (175°C). In a bowl, mix flour and sugar. Add melted butter, water, and vanilla extract. Stir until the mixture is smooth. Drop spoonfuls of batter onto a baking sheet. Bake for 10-12 minutes, until golden brown. Let them cool before serving. Enjoy your homemade wafer cookies with family and friends! Fun Facts About Wafer Cookies Here are some fun facts you might not know: Wafer cookies can be stacked. They make great towers! Some people like to use them for ice cream sandwiches. Wafer cookies are often used in cakes. They add a unique texture. They can be found in many cultures around the world. Where to Find Wafer Cookies Wafer cookies are widely available. You can find them at grocery stores, convenience stores, and online. Look for them in the snack aisle or the cookie section. Many brands offer wafer cookies. Some popular ones include: Nabisco Nilla Wafers: Classic vanilla flavor. Keebler Wafers: Available in different flavors. Little Debbie Wafers: Known for their sweet treats. Conclusion Wafer cookies are a delightful snack for everyone. They are light, crispy, and available in many flavors. You can enjoy them in various ways, from snacks to desserts. Making them at home is easy and fun! Whether you like chocolate, vanilla, or fruity flavors, there is a wafer cookie for you. So next time you crave a sweet treat, grab some wafer cookies. They are sure to bring joy! Nestle Chocolate Chip Cookie Recipe Welcome to the world of baking! Today, we will explore the famous Nestle Chocolate Chip Cookie Recipe. This recipe is simple and fun. It creates tasty cookies that everyone enjoys. Let’s get started! Why Chocolate Chip Cookies? Chocolate chip cookies are a classic treat. They are loved by kids and adults alike. Here are a few reasons why: They are easy to make. They are perfect for sharing. They taste delicious! You can customize them. Ingredients You Will Need Gather these ingredients before you start baking: Ingredient Amount All-purpose flour 2 1/4 cups Granulated sugar 3/4 cup Brown sugar 3/4 cup Butter, softened 1 cup (2 sticks) Vanilla extract 1 teaspoon Baking soda 1 teaspoon Salt 1/2 teaspoon Chocolate chips 2 cups Eggs 2 large Credit: www.blessthismessplease.com Steps to Make the Perfect Cookies Now that you have your ingredients ready, follow these simple steps: Preheat your oven to 375°F (190°C). In a large bowl, mix the butter, granulated sugar, and brown sugar. Add the eggs and vanilla extract. Mix well until combined. In another bowl, combine the flour, baking soda, and salt. Gradually add the dry mixture to the wet mixture. Stir gently. Fold in the chocolate chips. Make sure they are evenly distributed. Drop rounded tablespoons of dough onto ungreased baking sheets. Leave some space between each cookie. Bake for 9 to 11 minutes. Cookies should be golden brown. Remove from the oven and let them cool on the sheets. Tips for Perfect Cookies Here are some helpful tips to make your cookies even better: Use room temperature butter for easier mixing. Do not overmix the dough. Chill the dough for 30 minutes for chewier cookies. Use parchment paper for easy cleanup. Try different types of chocolate, like dark or white chocolate. Storing Your Cookies After baking, you want to keep your cookies fresh. Here’s how: Let cookies cool completely before storing. Use an airtight container to keep them fresh. Store at room temperature for up to a week. Freeze cookies for longer storage. They can last up to three months. Credit: cookiesfordays.com Fun Variations to Try Once you master the classic recipe, try these fun variations: Add nuts like walnuts or pecans. Mix in dried fruits like cranberries or raisins. Use peanut butter chips instead of chocolate chips. Make stuffed cookies with caramel or fudge centers. Conclusion The Nestle Chocolate Chip Cookie Recipe is a timeless classic. It’s simple, delicious, and fun to make. Whether you bake them for a party or just for yourself, these cookies are sure to bring smiles. So gather your ingredients and start baking today! Enjoy your sweet creation with friends and family. Happy baking! Cookie Cake near Me Are you craving something sweet? Have you ever tried a cookie cake? If you are asking yourself, “Where can I find a cookie cake near me?” then you are in the right place! This article will guide you through the wonderful world of cookie cakes. We will explore what cookie cakes are, where to find them, and how to enjoy them. What is a Cookie Cake? A cookie cake is a delightful dessert. It combines the texture of a cookie with the size of a cake. Imagine a giant chocolate chip cookie! It’s often decorated with icing. People love to enjoy them at parties, birthdays, and special events. Popular Flavors Of Cookie Cakes Chocolate Chip Oreo Peanut Butter Brownie Red Velvet Where to Find Cookie Cakes Near You Finding a cookie cake near you is easy! Here are some tips: 1. Local Bakeries Start by checking local bakeries. Many bakeries offer cookie cakes. They may have different flavors and sizes. Call them or visit their website to check their menu. 2. Grocery Stores Some grocery stores have bakery sections. They often sell cookie cakes. Look for them in the dessert aisle. You can also ask the staff for help. 3. Online Delivery Services Use online delivery services like Uber Eats or Grubhub. These services can help you find cookie cakes nearby. Just type “cookie cake” in the search bar. You can see a list of places that sell them. 4. Special Events And Fairs Check out local events and fairs. Many vendors sell cookie cakes at these gatherings. You can taste different flavors and enjoy a fun day out! How to Choose the Perfect Cookie Cake Now that you know where to find cookie cakes, how do you choose the best one? Here are some tips: 1. Consider The Occasion Think about the event you are celebrating. For birthdays, a chocolate chip cookie cake is a great choice. For holidays, try a festive flavor like peppermint. 2. Think About Your Guests Consider the tastes of your guests. Do they love chocolate? Go for a brownie cookie cake. Do they prefer fruity flavors? A lemon cookie cake might be perfect. 3. Check The Size Cookie cakes come in various sizes. If you are having a big party, choose a larger cake. For a small gathering, a smaller cookie cake works well. Credit: southernsugarbakery.com Credit: www.target.com How to Enjoy Your Cookie Cake Once you have your cookie cake, it’s time to enjoy it! Here are some fun ideas: 1. Share With Friends Cookie cakes are perfect for sharing. Cut them into slices and enjoy with friends. Everyone will love the sweet treat. 2. Pair With Ice Cream Add a scoop of ice cream on top. The warm cookie cake and cold ice cream make a great combo. You can choose any flavor of ice cream you like! 3. Serve With Milk Don’t forget the milk! A glass of cold milk goes perfectly with a cookie cake. It makes the experience even sweeter. Cookie Cake Recipes to Try at Home Feeling adventurous? You can make a cookie cake at home! Here’s a simple recipe: Chocolate Chip Cookie Cake Recipe Ingredients: 1 cup of butter 1 cup of brown sugar 1 cup of sugar 2 eggs 2 teaspoons of vanilla extract 3 cups of flour 1 teaspoon of baking soda 1 teaspoon of salt 2 cups of chocolate chips Instructions: Preheat your oven to 350°F (175°C). In a large bowl, mix butter, brown sugar, and sugar. Add eggs and vanilla extract, and mix well. In another bowl, combine flour, baking soda, and salt. Gradually add the flour mixture to the wet ingredients. Fold in the chocolate chips. Spread the dough into a greased cake pan. Bake for about 25-30 minutes. Let it cool before serving! Conclusion Finding a cookie cake near you is easy and fun. Whether you buy one or bake at home, cookie cakes are delightful. Remember to share them with friends and family. Enjoy every bite of this sweet treat! Now, go find your cookie cake and enjoy! Frequently Asked Questions (FAQs) 1. Can I Customize My Cookie Cake? Yes! Many bakeries allow customization. You can choose flavors, sizes, and decorations. 2. Are Cookie Cakes Suitable For Allergies? It depends on the ingredients. Always check with the bakery for allergy information. 3. How Should I Store Leftover Cookie Cake? Store it in an airtight container. Keep it at room temperature for up to three days. 4. Can I Freeze Cookie Cake? Yes, you can freeze cookie cake. Wrap it tightly and store it in the freezer. 5. What Is The Best Way To Serve A Cookie Cake? Slice it into wedges and serve with ice cream or milk for the best experience. Hy-Vee To-Go Cookies & Cream Mix News Are you a fan of cookies and cream? If so, you’re in for a treat! Hy-Vee has launched a new product that is sure to delight your taste buds. The Hy-Vee To-Go Cookies & Cream Mix is an exciting addition to their lineup. In this article, we will explore everything you need to know about this new mix. What is Hy-Vee To-Go Cookies & Cream Mix? The Hy-Vee To-Go Cookies & Cream Mix is a ready-to-use mix. It combines the rich flavors of chocolate cookies and creamy vanilla. This mix is perfect for making delicious treats at home. You can whip up cookies, cakes, or even shakes! Why You’ll Love It Convenience: It’s easy to use. Just add water or milk, mix, and enjoy! Versatile: You can use it in various recipes. Create cookies, cupcakes, or even ice cream. Tasty: The flavor is rich and creamy. It satisfies your sweet cravings. Family-Friendly: Everyone will love it, from kids to adults. How to Use Hy-Vee To-Go Cookies & Cream Mix Using this mix is very simple. Follow these easy steps: Gather your ingredients: The mix, water or milk, and any extra toppings you want. In a bowl, combine the mix with water or milk. Stir well until there are no lumps. Choose your recipe: cookies, cupcakes, or shakes. Follow the baking or preparation instructions. Enjoy your tasty treat! Credit: www.msn.com Fun Recipe Ideas Here are some fun recipe ideas using the Hy-Vee To-Go Cookies & Cream Mix: 1. Cookies Make classic cookies with the mix. Here’s how: Preheat your oven to 350°F (175°C). Prepare the mix as directed. Scoop dough onto a baking sheet. Bake for 10-12 minutes. Let cool, then enjoy! 2. Cookies & Cream Cupcakes Make delicious cupcakes using the mix: Prepare the mix as directed. Pour into cupcake liners. Bake for 15-20 minutes. Let cool, then frost with cream cheese icing. 3. Cookies & Cream Milkshake Blend up a tasty milkshake: Prepare the mix with extra milk. Add ice cream to the mix. Blend until smooth. Serve with whipped cream on top. Credit: wgntv.com Where to Buy Hy-Vee To-Go Cookies & Cream Mix You can find the Hy-Vee To-Go Cookies & Cream Mix at your local Hy-Vee store. It’s also available online through their website. This makes it easy to get your hands on this tasty treat! Customer Reviews Many customers have already tried the mix. Here are some of their thoughts: Amy: “The cookies were so easy to make! They tasted amazing!” Jake: “I loved the milkshake! It was super creamy.” Sarah: “My kids devoured the cupcakes. They want more!” Nutrition Information It is essential to check the nutrition label on the packaging. The Hy-Vee To-Go Cookies & Cream Mix is designed to be a treat. Enjoy it in moderation as part of a balanced diet. Typical Nutrition Facts (per Serving): Nutrient Amount Calories 150 Total Fat 7g Saturated Fat 4g Sodium 100mg Total Carbohydrates 22g Dietary Fiber 1g Sugars 10g Protein 2g Conclusion The Hy-Vee To-Go Cookies & Cream Mix is a fun and delicious product. It is perfect for making tasty treats at home. Whether you choose cookies, cupcakes, or milkshakes, you will love it! Don’t forget to share with your family and friends. Enjoy the sweet moments together! Try it out today and discover your new favorite snack! Hy-Vee To-Go Cookies & Cream Mix Are you a fan of cookies and cream? If so, you are in for a treat! Hy-Vee has created a special mix just for you. The Hy-Vee To-Go Cookies & Cream Mix is the perfect choice for dessert lovers. It is easy to make and super tasty! Credit: wgntv.com What is Hy-Vee To-Go Cookies & Cream Mix? Hy-Vee To-Go Cookies & Cream Mix is a delicious blend of cookie pieces and cream flavor. It is designed for quick preparation. You can enjoy it any time you want a sweet snack. Just add a few simple ingredients, and you’re ready to go! Why Choose Hy-Vee To-Go Cookies & Cream Mix? There are many reasons to love this mix: Quick and Easy: It takes only a few minutes to prepare. Great for All Ages: Kids and adults will love it! Perfect for Parties: Impress your friends with this tasty treat. Versatile: You can use it in many different recipes. How to Make Hy-Vee To-Go Cookies & Cream Mix Making cookies and cream treats is super simple! Here’s how to do it: Ingredients You Will Need: 1 package of Hy-Vee To-Go Cookies & Cream Mix 1/2 cup of butter, softened 1 large egg Optional: Chocolate chips or sprinkles for extra fun! Step-by-step Instructions: Preheat your oven to 350°F (175°C). In a large bowl, mix the softened butter and egg together. Add the Hy-Vee To-Go Cookies & Cream Mix to the bowl. Stir until everything is well combined. If you like, add chocolate chips or sprinkles. Drop spoonfuls of dough onto a baking sheet. Bake for 10-12 minutes or until golden brown. Let cool before serving. Enjoy! Fun Ways to Enjoy Your Cookies & Cream Mix Hy-Vee To-Go Cookies & Cream Mix can be enjoyed in many ways. Here are some fun ideas: 1. Cookies & Cream Milkshake Blend cookies and cream mix with milk and ice cream. It makes a tasty milkshake! 2. Ice Cream Topping Crush the cookies and sprinkle them on top of your ice cream. It adds a crunchy texture! 3. Cookies & Cream Pancakes Add the mix to your pancake batter for a sweet twist. Your breakfast will be special! Where to Find Hy-Vee To-Go Cookies & Cream Mix You can find the Hy-Vee To-Go Cookies & Cream Mix at your local Hy-Vee store. It is usually located in the baking aisle. If you can’t find it, ask a store employee for help. Customer Reviews Let’s see what people are saying about this mix: Emily: “My kids love it! We make cookies every week.” John: “Super easy to make, and they taste amazing!” Sarah: “I used it for a party, and everyone wanted the recipe!” Health Information While Hy-Vee To-Go Cookies & Cream Mix is a delicious treat, moderation is key. Enjoy it as part of a balanced diet. Always check the packaging for nutritional information. Final Thoughts If you love cookies and cream, you must try Hy-Vee To-Go Cookies & Cream Mix. It is simple, fun, and super tasty! Gather your friends and family for a baking session. You will create delicious memories together. So what are you waiting for? Grab your mix and start baking today! Credit: wgntv.com Frequently Asked Questions (FAQs) 1. Can I Make The Mix Without Eggs? Yes! You can substitute eggs with applesauce or a flaxseed mix. 2. How Should I Store The Cookies? Store them in an airtight container to keep them fresh. 3. Can I Freeze The Cookie Dough? Absolutely! You can freeze the dough for later use. 4. Is It Suitable For Birthday Parties? Yes! Cookies and cream treats are a hit at any party! Join the Cookie Craze! Hy-Vee To-Go Cookies & Cream Mix is more than just a dessert. It is a fun activity for everyone. So, roll up your sleeves and start baking! Don’t forget to share your creations on social media. Use the hashtag #HyVeeCookiesAndCream. Happy baking! Cookie Dough Recipe Are you a cookie lover? Do you enjoy the sweet taste of cookie dough? If yes, you are in for a treat! This cookie dough recipe is easy, delicious, and safe to eat raw. You can enjoy it straight from the bowl or use it to make cookies. Let’s dive into this fun recipe! Why Make Cookie Dough? Cookie dough is a fun treat. It is sweet, creamy, and totally yummy. Here are some reasons to make cookie dough: Great for snacking Perfect for baking cookies Easy to customize Safe to eat raw Credit: whatmollymade.com Ingredients for Cookie Dough Here is what you need to make cookie dough: Ingredient Amount Unsalted butter 1/2 cup (softened) Brown sugar 1/2 cup Granulated sugar 1/4 cup Vanilla extract 1 teaspoon All-purpose flour 1 cup (heat-treated) Salt 1/4 teaspoon Chocolate chips 1/2 cup What is Heat-Treated Flour? Heat-treated flour is safe to eat raw. It kills harmful bacteria. To heat-treat flour, follow these steps: Preheat your oven to 350°F (175°C). Spread the flour on a baking sheet. Bake for 5 minutes. Let it cool before using. Step-by-Step Instructions Now, let’s make cookie dough! Follow these easy steps: In a large bowl, cream the softened butter. Add brown sugar and granulated sugar. Mix well. Add the vanilla extract. Stir until combined. In a separate bowl, mix the heat-treated flour and salt. Gradually add the flour mixture to the wet ingredients. Mix until a dough forms. Add chocolate chips and fold them in gently. How to Enjoy Your Cookie Dough You can enjoy your cookie dough in many ways: Eat it straight from the bowl! Make cookie sandwiches with ice cream. Use it as a topping for brownies. Shape it into balls and freeze for later. Credit: www.pinterest.com Storing Your Cookie Dough To keep your cookie dough fresh, follow these tips: Store in an airtight container. Refrigerate for up to one week. Freeze for up to three months. Fun Variations of Cookie Dough Want to try something different? Here are some fun variations: Peanut Butter Cookie Dough: Add 1/2 cup of peanut butter. Oreo Cookie Dough: Mix in crushed Oreo cookies. Brownie Batter Cookie Dough: Add cocoa powder and chocolate chunks. Rainbow Cookie Dough: Stir in colorful sprinkles. Tips for the Best Cookie Dough Here are some helpful tips: Use room-temperature butter for easy mixing. Don’t overmix the dough. Use high-quality chocolate chips for better flavor. Experiment with different mix-ins. Frequently Asked Questions Can I Bake This Cookie Dough? Yes, you can bake it! Preheat your oven to 350°F (175°C). Roll the dough into balls. Place them on a baking sheet. Bake for 10-12 minutes. Is This Cookie Dough Safe To Eat Raw? Yes! This recipe uses heat-treated flour. It is safe to eat raw. How Long Can I Store Cookie Dough? You can store it in the fridge for one week. Freeze it for up to three months. Conclusion Now you have a simple and delicious cookie dough recipe. It is perfect for snacking or baking. Enjoy this sweet treat with family and friends. Try out different variations to make it your own. Happy baking! Pillsbury Halloween Cookies Halloween is a special time of year. Kids love it for the costumes. Adults enjoy the spooky decorations. One of the best parts of Halloween is the treats! This is where Pillsbury Halloween Cookies come in. These cookies are fun, easy to make, and taste delicious. Let’s explore why Pillsbury Halloween Cookies are perfect for your Halloween celebration! Why Choose Pillsbury Halloween Cookies? Pillsbury Halloween Cookies are a great choice for many reasons: Easy to Make: Just open the package and bake! Fun Shapes: They come in spooky shapes like ghosts and pumpkins. Tasty Flavors: Enjoy classic flavors like sugar and chocolate chip. Kid-Friendly: Kids can help decorate and have fun in the kitchen. Types of Pillsbury Halloween Cookies Pillsbury offers several types of Halloween cookies. Here are some popular options: Cookie Type Shapes Flavors Ready-to-Bake Cookies Ghosts, Pumpkins, Bats Sugar, Chocolate Chip Cookie Dough Spooky Designs Various Flavors Frosted Cookies Decorated Shapes Sugar Cookie with Frosting How to Make Pillsbury Halloween Cookies Making Pillsbury Halloween Cookies is simple. Just follow these easy steps: Preheat Your Oven: Set the oven to 350°F (175°C). Prepare the Baking Sheet: Use a non-stick baking sheet or line it with parchment paper. Open the Package: Carefully remove the cookie dough from its packaging. Shape the Cookies: Place the cookie dough on the baking sheet. Bake: Cook for 10-12 minutes or until golden brown. Cool: Let the cookies cool before decorating. Decorating Your Halloween Cookies Decorating is one of the best parts! Here are some fun ideas: Use Colored Icing: Create spooky designs with black and orange icing. Sprinkles: Add colorful sprinkles for extra fun. Chocolate Chips: Use chocolate chips for eyes or mouths. Edible Glitter: Make your cookies sparkle with edible glitter. Credit: www.tasteofhome.com Fun Activities with Pillsbury Halloween Cookies Making and decorating cookies can be a fun activity. Here are some ideas: Cookie Decorating Party: Invite friends over for a cookie party. Halloween Contest: See who can make the scariest cookie. Story Time: Read Halloween stories while decorating cookies. Gift Cookies: Share your cookies with friends and family. Storage Tips for Leftover Cookies If you have leftover cookies, here are some tips: Cool Completely: Make sure cookies are cool before storing. Use an Airtight Container: This keeps cookies fresh longer. Refrigerate: You can refrigerate cookies for extra freshness. Freeze: For long-term storage, freeze cookies in a bag. Credit: www.kroger.com Where to Buy Pillsbury Halloween Cookies Pillsbury Halloween Cookies are easy to find. Here are some places to check: Grocery Stores: Most grocery stores carry them during Halloween. Online Retailers: Websites like Amazon often have Pillsbury products. Big Box Stores: Stores like Walmart and Target usually stock them. Conclusion Pillsbury Halloween Cookies are a fun way to celebrate Halloween. They are easy to make, delicious, and perfect for all ages. Whether you are baking alone or having a party, these cookies can bring joy to your Halloween festivities. So grab a package and start creating spooky treats today! Cookie Sheet Welcome to the wonderful world of baking! Today, we will explore the amazing tool known as the cookie sheet. A cookie sheet is a flat, rectangular metal pan used for baking cookies and other treats. Let’s dive into everything you need to know about cookie sheets. Credit: krollskorner.com What is a Cookie Sheet? A cookie sheet is a baking pan. It is usually made of metal. The sheet has low sides or no sides at all. This design helps cookies bake evenly. It also allows air to circulate. This makes cookies crispier! Types of Cookie Sheets There are different types of cookie sheets. Each type has its unique features. Here are some common types: Aluminum Cookie Sheets: These are lightweight and heat up quickly. Non-Stick Cookie Sheets: These sheets have a coating that prevents sticking. Insulated Cookie Sheets: These have two layers of metal. They help cookies bake evenly. Air Bake Cookie Sheets: These have a layer of air between two metal sheets. They prevent burning. Silicone Baking Mats: These mats can be placed on any baking sheet. They provide a non-stick surface. Why Use a Cookie Sheet? Using a cookie sheet is very important when baking. Here are some reasons why: Even Baking: Cookie sheets help cookies bake evenly. Easy Cleanup: Non-stick sheets make cleaning simple. Multiple Uses: You can bake more than cookies. You can bake fries, vegetables, and more! Time-Saving: You can bake multiple trays at once. Choosing the Right Cookie Sheet Choosing the right cookie sheet is important. Here are some tips to help you pick: Material: Choose aluminum for quick heating. Non-stick is great for easy removal. Size: Make sure it fits in your oven. A standard size is 18 x 13 inches. Weight: A heavier sheet will be more durable. Edges: Look for a sheet with low edges for better airflow. How to Care for Your Cookie Sheet Proper care will extend the life of your cookie sheet. Here are some tips: Wash by Hand: Avoid the dishwasher. Hand wash with soap and water. Dry Immediately: Wipe it dry to prevent rust. Avoid Metal Utensils: Use silicone or wooden tools to prevent scratches. Store Properly: Keep it in a cool, dry place. Delicious Recipes for Cookie Sheets Now that you know about cookie sheets, let’s try some fun recipes! Here are some easy recipes you can bake on your cookie sheet: Classic Chocolate Chip Cookies Ingredients: 1 cup butter, softened 1 cup sugar 1 cup brown sugar 2 eggs 2 tsp vanilla extract 3 cups flour 1 tsp baking soda 1/2 tsp salt 2 cups chocolate chips Instructions: Preheat your oven to 350°F (175°C). Mix butter, sugar, and brown sugar in a bowl. Add eggs and vanilla. Mix well. In another bowl, mix flour, baking soda, and salt. Add the dry mix to the wet mix. Stir until combined. Fold in chocolate chips. Drop spoonfuls on the cookie sheet. Bake for 10-12 minutes. Sheet Pan Pizza Ingredients: 1 pizza dough 1 cup pizza sauce 2 cups shredded mozzarella cheese Your favorite toppings (pepperoni, vegetables, etc.) Instructions: Preheat your oven to 475°F (245°C). Roll out the pizza dough on the cookie sheet. Spread pizza sauce evenly. Sprinkle mozzarella cheese on top. Add your favorite toppings. Bake for 15-20 minutes. Let it cool before slicing. Fun Facts About Cookie Sheets Did you know these fun facts about cookie sheets? The first cookie sheets were made of cast iron. Cookie sheets can be used for roasting vegetables too! Silicone baking mats were invented in France. Some people call them “baking sheets” instead of cookie sheets. Credit: www.amazon.com Conclusion In conclusion, cookie sheets are essential for baking. They come in many types and sizes. Choose the right one for your needs. Remember to care for your cookie sheet properly. Try out delicious recipes and have fun baking!