Creme Brulee With Crunchy Caramel
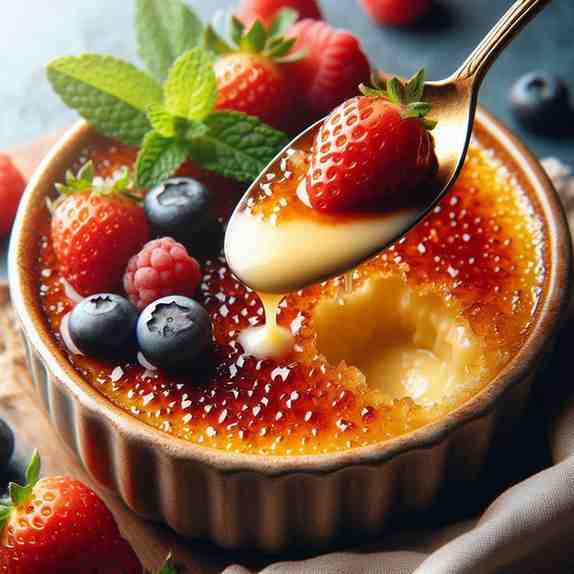
Creme Brulee Recipe Creme Brulee with Crunchy Caramel is a symphony of contrasting textures. This culinary masterpiece melds the creaminess of custard with the crisp sweetness of a perfectly torched sugar crust. This dish promises to be the star of any event with its luscious simplicity and hint of artistic flair, creating a memory that goes beyond taste and passes the test of time. Ingredients for Creme Brulee: For the Crème Brûlée: the Caramel Topping: Instructions: Preheat the Oven: Preheat your oven to 325°F (160°C). Prepare the Custard: Strain the Mixture: Strain the custard mixture through a fine-mesh sieve into another bowl to remove any potential bits of cooked egg or vanilla bean. Fill Ramekins: Pour the custard into ramekins or oven-safe dishes. Bake in a Water Bath: Place the ramekins in a baking dish and fill the baking dish with hot water until it reaches about halfway up the sides of the ramekins. This water bath helps the custard cook evenly. Bake in the Oven: Bake in the preheated oven for about 40-45 minutes or until the custard is set around the edges but still slightly jiggly in the center. Chill: Remove the ramekins from the water bath and let them cool. Then, cover and refrigerate for at least 2-4 hours or overnight until completely chilled. Prepare the Caramel Topping: Serve: Allow the caramelized sugar to cool for a minute or two, then serve and enjoy your delicious crème brûlée with a satisfyingly crunchy caramel topping! Tips for a creme brulee with crunchy caramel: Making a perfect crème brûlée with a crunchy caramelized top requires attention to detail and precision. Here are some tips to help you achieve a delicious crème brûlée with a crunchy caramel topping: Quality Ingredients: Use the best quality vanilla beans, heavy cream, and fresh eggs for a rich and flavorful custard. Temper the Eggs: Gradually add the hot cream to the beaten eggs to temper them. This prevents the eggs from scrambling when you mix them with the hot liquid. Strain the Mixture: Strain the custard mixture before pouring it into the ramekins. This helps remove any curdled bits and ensures a smooth texture. Water Bath: Bake the custards in a water bath. This gentle, indirect heat helps the custard cook evenly and prevents cracking. Low and Slow: Bake at a low temperature (around 325°F or 163°C) for a longer time. This slow baking process results in a creamy texture. Chill Thoroughly: After baking, let the custards chill in the refrigerator for at least 4 hours or overnight. This allows the custard to set and makes it easier to create a smooth, even caramel layer. Dry the Surface: Before adding the sugar for caramelization, make sure the surface of the custard is dry. Any moisture can hinder the caramelization process. Even Sugar Layer: Sprinkle an even layer of fine sugar (granulated or caster sugar) on top of the chilled custard. Spread it out to ensure even caramelization. Use a Torch: Use a culinary torch for caramelization. Move the flame in a circular motion to evenly caramelize the sugar. Hold the torch at a slight angle for best results. Uniform Color: Aim for a golden-brown color in the caramelized layer. Be careful not to burn it, as this can result in a bitter taste. Chill Again: Allow the caramelized custards to chill for a few minutes to let the caramel harden and create a crunchy texture. Serve Immediately: Serve the crème brûlée soon after caramelizing the top to maintain the contrast between the creamy custard and the crunchy caramel layer. Garnish: Consider adding a fresh mint leaf or a few berries as a garnish for both visual appeal and flavor contrast. Some frequently asked questions (FAQs) about making creme brule: some frequently asked questions (FAQs) about making crème brûlée: 1 What is crème brûlée? Crème brûlée is a classic French dessert consisting of a rich and creamy custard base topped with a layer of caramelized sugar. The sugar is typically caramelized using a kitchen torch to create a crispy, sweet crust. 2 What ingredients do I need to make crème brûlée? The basic ingredients for crème brûlée include heavy cream, egg yolks, sugar, and vanilla extract. You’ll also need sugar for the caramelized crust on top. 3 Can I use vanilla extract or vanilla bean in crème brûlée? Yes, you can use either vanilla extract or vanilla bean. Using a vanilla bean will give a more intense and aromatic vanilla flavor, while vanilla extract is a convenient alternative. 4 How do I prevent my crème brûlée from curdling? To prevent curdling, it’s essential to temper the hot cream mixture into the egg yolks slowly. Gradually whisk the hot cream into the egg yolks, stirring continuously, to avoid cooking the eggs too quickly. 5 Do I need a kitchen torch to caramelize the sugar on top? While a kitchen torch is the traditional tool for caramelizing the sugar, you can also use the broiler in your oven. Place the ramekins under the broiler for a short time, but be sure to watch them closely to avoid burning. 6 How long does it take to caramelize the sugar on top? Caramelizing the sugar with a kitchen torch usually takes a minute or two. When using the broiler, it may take a bit longer, so keep a close eye on it to achieve the desired golden-brown crust. 7 Can I prepare crème brûlée in advance? crème brûlée is an excellent make-ahead dessert. You can prepare the custard and refrigerate it in the ramekins. Caramelize the sugar just before serving to maintain the crispy crust. 8 How do I know when my crème brûlée is done baking? The custard should be set around the edges but still slightly jiggly in the center. Baking times may vary, but a common range is 30 to 40 minutes at a low temperature, around 325°F (163°C). 9 Can I substitute heavy cream with a lighter alternative? While heavy cream contributes to the richness of crème brûlée, you can use a mixture of milk and cream or even half-and-half for a slightly lighter version. 10 How should I store leftover crème brûlée? Store leftover crème brûlée in the refrigerator. However, keep in mind that the caramelized crust may lose its crispiness over time, so it’s best to enjoy it within a day or two of making.